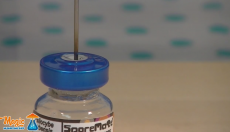
How to make a spore syringe ?
Posted under: How to's

If you're interested in growing P. cubensis mushrooms, one of the first steps is to obtain spores. One way to do this is by making a spore syringe, which can be used to inject spores into a substrate for growing mushrooms. In this post, we'll go over how to make, prepare, store, and use a spore syringe for magic mushrooms.
Materials you'll need:
- Spore print
- Sterile syringe (10-12ml)
- Sterile water (distilled or purified)
- Alcohol (70% isopropyl or higher)
- Sterile gloves
- Flame source (lighter or alcohol burner)
- Disinfectant spray (Lysol or similar)
Making the spore syringe
The first step in making a spore syringe is to sterilize your work area and materials. This can be done by spraying Lysol or a similar disinfectant and wiping with a clean cloth. Put on sterile gloves to further minimize contamination risks.
Next, sterilize the needle of your syringe by holding it over a flame source until it turns red hot, then letting it cool down. Do the same with your scalpel and tweezers.
Make spore water
To create a spore syringe, there are several techniques you can use. The most common method is to transfer 10 mL of sterile water into a shot glass or small glass cup. Then, while holding the spore print gently, use a scalpel to scrape the spores into the water. Depending on how many syringes you want to prepare, you can adjust the amount of spores accordingly.
Here is what to do:
- Fill one jar with sterile water: Use either purchased or homemade sterile water that has been filtered. Sterile water can be purchased at any local drug store.
- Draw 10ml of water into your syringe: Draw up the water and immediately recap the syringe without touching the opening or syringe cap.
- Transfer spores: Open your spore print and use a scalpel to scrape them into the empty jar. You don’t need to take the whole print, but the amount you take will affect the concentration of your spore syringe.
- Suspend the spores in water: Open your syringe again and transfer the water into the jar with your spores. This will suspend the spores in water and allow them to hydrate.
- Mix and finalize the syringe: Draw the spore-laden water up into the syringe. Expel the water into the jar once more, then draw it up again before capping the syringe. This helps break up the spores and ensure they are not clumped together.
Hydrate the spores
Once you've drawn up the spore solution, cap the needle and allow the spores to hydrate for about 24 hours, or preferably 2-3 days.
Preparing to use the spore syringe:
When you're ready to use the spore syringe, sterilize your work area, gloves, and the syringe as described above. Fill a sterilized container (such as a Petri dish) with the substrate you plan to use for growing the mushrooms, and sterilize the substrate according to your preferred method (e.g. pressure cooking or autoclaving).
Once the substrate has cooled down, inject the spore solution into the substrate by injecting it at various points around the container. Incubate the container in a warm, dark place for several days until mycelium growth appears.
Storing the spore syringe:
To store the spore syringe, wrap it in foil to protect it from light and heat. Store the wrapped syringe in a cool, dark place such as a fridge or freezer, but avoid freezing the syringe as this can damage the spores. Properly stored, a spore syringe can last for several months or even years.
It's important to note that cultivating mushrooms can be a complex process that requires careful attention to detail and sanitation. To minimize contamination risks, it's recommended to do further research and practice sterile techniques. For example, you might want to consider using a laminar flow hood or working in a glovebox to further minimize contamination risks.
In conclusion, making a spore syringe for P. cubensis mushrooms is a straightforward process that can help you get started with growing your own mushrooms. With the right materials, techniques, and attention to detail, you can successfully cultivate these fascinating fungi in your own home.


January 26, 2012