You have no items in your shopping cart.
Cloud920® Ready-to-grow bag Instructions
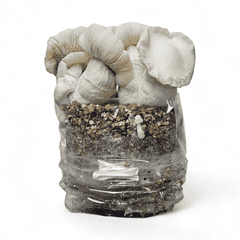
Table of contents
Good to Know Before You Grow – Cloud920® Ready-to-Grow Bags
- Start growing immediately upon receiving your grow box. If you need to wait, check our guide on storing your Ready-to-Grow bag.
- Maintain cleanliness to prevent contamination from fungi and bacteria (microorganisms).
- Use only clean tap or mineral water for misting and soaking. Do not use distilled or demineralized water.
- No additional water or care is needed during the first cycle.
- Keep the temperature at 23°C for optimal growth.
- Avoid complete darkness and direct sunlight—mushrooms need indirect light to thrive.
- Harvest at the right time to preserve potency and quality.
What's in the box?
- 1x Ready-to-Grow Bag
Contains a nutrient-rich substrate with active mycelium (the “cake”). Equipped with micron filters to allow fresh air in while keeping contaminants out. - 1x Large Bag Clip
An easy-to-use and secure way to close your grow bag, maintaining ideal growing conditions. Just slide it over to the side. - 1x Rubber band
Placed around the substrate at the top to prevent side growth (side pinning).
Preparing the Cloud920® shroom kit
- Close all doors and windows to prevent drafts from introducing unwanted contaminants into your substrate bag. Let the air settle before opening your kit.
- Place the grow bag only on freshly disinfected surfaces.
- Ensure your hands and arms are clean before handling the kit. Use surgical gloves and/or a good disinfectant to sanitize your hands and arms. Wear a face mask to prevent breathing into the grow bag and onto the cake.
Starting the cultivation process
- Remove the Ready-to-Grow Bag from the box and unroll it.
- Gently pull the sides of the bag apart to allow fresh air to flow inside. Then, immediately close it with the clip.
- To prevent mushrooms from growing on the sides (side pinning), place the rubber band around the bag at the same height as the top of the substrate.
Note: Using the rubber band may result in some water collecting on the surface of the substrate after several days. If this happens, you can open the bag, carefully pour out the excess water, then close the bag again and continue as usual. - Keep the Ready-to-Grow Bag in a clean and stable environment at an ideal temperature of 23°C. Avoid complete darkness and direct sunlight.
- Now, all you need is patience! Cloud920® Bags take approximately 3 to 4 weeks to be ready for harvest. Ventilation is not required in most cases.
Note: If no pins appear after 3 weeks, ventilate the bag once daily. Slide off the clip, refresh the air inside, and close it again. Stop ventilating as soon as pins become visible.
Growing conditions
Temperature
- The ideal temperature for growth is 23°C. Ensure that the temperature stays above 21°C and does not exceed 27°C.
- If temperatures drop below 21°C, consider using a thermal heatingmat. This is especially useful in colder regions or during winter to maintain optimal growing conditions.
- Always place pencils or other objects between the bag and the heat mat. This ensures even heat distribution and prevents overheating in specific spots.
Light
- Cloud920® Ready-2-Grow Bags need indirect sunlight to recognize the day and night cycle.
- Light plays a crucial role in achieving a good yield, but avoid direct sunlight on the grow kit at all times, as it can cause overheating and dry out the substrate.
Water / Misting
Cloud920® Ready-to-Grow Bags contain enough water within the substrate to sustain at least two flushes. No additional watering or maintenance is required—simply set it up and let nature take its course.
Flushes
The first mushrooms typically appear within 2 to 3 weeks, so patience is key. Once the pins emerge, the mushrooms will be ready for harvest in about one week.
Harvesting of the mushrooms
- Like all cubensis mushrooms, harvest the mushrooms as soon as the veil under the cap breaks.
- After the veil breaks, the mushrooms will grow, but mostly in water weight rather than potency.
- If you wait until they are fully open, they will be harder to remove, increasing the risk of damaging the substrate. Additionally, fully matured mushrooms may tend to become hollow inside after drying.
- The best approach is to harvest mature mushrooms while allowing others to continue growing. In practice, many will be ready around the same time.
- To harvest, roll down the bag to expose the substrate, making it easier to pick the mushrooms that are ready.
- Once all mature mushrooms have been harvested, simply close the bag, place the kit back in its growing spot, and wait for the next flush of pins to appear.
Soaking
Cloud920® grow kits only need to be soaked after the second harvest, as they contain enough water for the first two flushes.
Exception: If parts of the substrate crumble off during harvesting, it’s a sign that the kit needs soaking earlier.
How to Soak the Cloud920® Ready-to-Grow Bag
- Fill the bag with clean tap or spring water until the substrate is fully submerged.
- Let it soak overnight.
- The next day, drain the excess water and return the kit to its growing spot.
The end
- If no more mushrooms appear after 4 weeks, the substrate is exhausted, and the kit has reached the end of its cycle.
- If you notice green discoloration, this indicates contamination, and you should discard the bag.
- Other discolorations than blue can be harmful. If you’re unsure, you can send a picture to our customer service for assessment.
Store the kit for later use
If you’re not ready to start growing immediately, you can store the kit in the refrigerator at 2°C to 8°C for up to 2 weeks to maintain its quality.
- Keep the ready to grow bag inside the box and place it in the fridge.
- Ensure the refrigerator is clean and free of mold to prevent contamination.
- For extra protection, you can store the kit in a clean plastic bag or a soaking bag before it is used.
Recommended products to use in addition
Face Mask
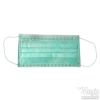 Use a surgeon face mask. Cover your mouth and keep the grow kit free from bacteria and other h...
Surface Disinfectant Spray
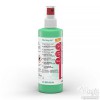 A strong disinfectant spray to clean surfaces of mictro organisms. Based on alcohol. The desin...
Disinfectant Hand Sanitizer | Softa-Man Handgel
 Softa-Man® hand sanitizer is used by microbiologists and surgeons all over the world. Use ...
Thermo Heatingmat
 Grow magic mushrooms the whole year round. The thermo mat heats up your magic mushroom grow ki...
Digital Hygrometer & Thermometer with external sensor
 Need to know the temperature in your mushroom grow room? Get this Hygrometer and Thermometer. ...